


Consulting for Travel Photographers: Designing a Scalable Minimalist Workflow
This article lays out a repeatable, minimalist workflow you can apply to any assignment or self-directed project so you deliver editor-ready shot lists, strong single-lens stories, and a consistent brand voice—without hauling a trunk of gear or burning daylight on logistics. ⏱️ 7-min read
Designing a Scalable Minimalist Workflow
Keep the workflow short, repeatable and measurable. I use a five-stage structure that fits weekend features and month-long commissions alike: research, shot-listing, shooting, editing, delivery. Each stage has a narrow scope and a single owner (you or a collaborator), so the process scales by trip length, not by complexity.
- Research — Gather local context, contacts, permits, and story hooks that will shape the shot-list.
- Shot-listing — Turn research into a prioritized, editor-aligned shot list and storyboard.
- Shooting — Execute the list with a compact kit and time-boxed coverage to avoid scope creep.
- Editing — Cull and grade with a one-bag workstation and consistent presets to produce publishable frames quickly.
- Delivery — Export using naming, metadata and export templates that match the buyer’s requirements.
Use simple templates, presets and checklists at each stage so you don’t reinvent the wheel. Save a master folder per client or publication with versioned templates—this small overhead makes every new trip faster and predictable.
Crafting Editor-Ready Shot Lists That Sell Travel Features
Editors buy clarity. An editor-ready shot list tells them the story’s concept, the lead image, supporting frames, and how each frame functions editorially. Align every shot with a publication brief or your pitch so there is no ambiguity about intent.
A reusable shot-list template should include concise fields; keep it digital and searchable so you can reuse or adapt by destination.
- Shot ID / sequence number
- Shot type (hero, environmental portrait, detail, B-roll)
- Location / GPS or landmark
- Time of day / light note
- Lens / focal length and framing note
- Color / tonal note (mood, palette, wardrobe cues)
- Caption cue / angle for copy
- Editorial priority (must-get, nice-to-have, optional)
- Permissions / contact (if needed on location)
Deliver the shot list with 3–5 example frames or visual references. If you’re pitching, pair the list with a lead image mockup idea and a short one-line sell for the pitch editor.
From Idea to Shot List: Building a Narrative Arc for Global Photo Essays
Great photo essays are organized stories, not just pretty pictures. Translate your concept into a three-part storyboard: hook, development, payoff. This keeps your images editorially useful and helps editors envision spread layout and narrative lift.
- Hook: The opening image that captures curiosity and establishes place or conflict.
- Development: A sequence that builds context—people, routines, environment, contrasts.
- Payoff: A resolving image or powerful detail that delivers the emotional or visual conclusion.
Map the geography to the arc: sequence locations so the travel through the story feels natural. Use time-of-day planning to create visual continuity (dawn for quiet place-setting frames, midday for markets, golden hour for portraits and landscapes). The point is to guide an editor’s eye through a beginning, middle and end with images that reinforce each step.
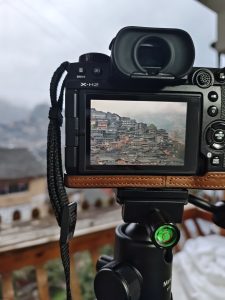
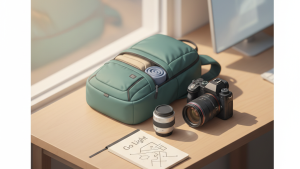
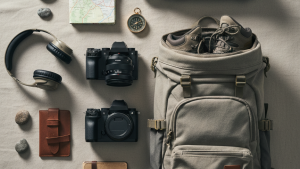
Go Light, Create Big: Mastering Minimal Gear for Extended Travel Photography
Minimalism is tactical: pick gear that covers most scenarios well and plan for a few contingencies. A proven compact kit is two bodies (one as hot backup), a versatile zoom, and a fast prime for low light and portrait isolation. This combination covers landscapes, street scenes, and portraits without redundancy.
- Primary body + backup body (same mount if possible)
- Versatile zoom (24–70mm or 24–105mm equivalent)
- Fast prime (35mm or 50mm) for low light and ritzy single-lens storytelling
- Small tripod or tabletop support, one spare battery per body, compact cleaning kit
- Durable camera bag with quick access zones and a separate pouch for passports and permits
Plan contingencies: carry at least two memory cards per day’s shooting and one mirror for long-term backup (external SSD or cloud sync when online). Maintain gear in-field—clean sensors and contacts, rotate batteries, and keep a small tool kit for lens swaps. Lightweight gear saves time and reduces the cognitive load of decisions on the road.
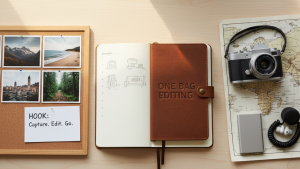
One-Bag Editing: A Minimalist Workflow for Travel Photographers
Editing on the road should be fast, consistent and safe. Your portable workstation is a dependable laptop with a calibrated profile, a rugged external SSD for raw footage, and a simple backup strategy (local + cloud when possible).
Follow a tight editing sequence:
- Ingest to a structured folder with date and project code.
- Automatic backup to the external SSD; second backup to cloud or another drive when bandwidth allows.
- Rapid cull using ratings (1–5) and flags—aim to reduce by 70–80% in the first pass.
- Quick global edits with a consistent preset; save variant stacks for alternative moods.
- Export using named templates (publication, web, social) with embedded metadata and caption blocks.
Standardize file naming and metadata so editors can ingest your files immediately: [ClientCode]_[YYYYMMDD]_[Sequence]_[ShortCaption]. Include IPTC captions and credit lines at export.
Destination Research for Travel Features
Condense research into a one-page location brief you can reference on the ground. The brief should be practical: access, permits, costs, language notes, cultural sensitivities, weather windows, and local contacts or fixers.
- Essential logistics: nearest airport, transport times, recommended windows for light
- Legal / permit needs and contact info for authorities or venue managers
- Costs and expected fees for access or talent
- Safety and cultural sensitivity notes (dress codes, photography taboos)
- Local fixer or contact with phone numbers and a backup method to reach them
Keep the brief mobile-friendly: a single PDF or note card you can open offline. Update it as you learn on the ground so the brief becomes a live resource for repeat commissions.
Narrative Arc and Storyboarding for Photo Essays
Translate the location brief and shot list into a page-by-page storyboard that pairs images to provisional captions and headline hooks. This helps editors visualize the flow and makes sequencing reviews faster and less subjective.
- Thumbnail the proposed lead and supporting images in order.
- Attach one-line caption cues and suggested pull-quotes or stats to each thumbnail.
- Mark potential spreads: strong single-image openers and two-image spreads for contrasts.
- Flag backup images for any red-flag shots that might fail (lighting, access).
When you submit a storyboard, include an alternate sequencing option—editors like choices, and this demonstrates editorial thinking rather than just technical delivery.
Brand-Voice Consistency: Tone, Terms, and Trust in Travel Media
Consistency builds trust. Develop a compact style guide that covers tone, preferred terms, caption length, credit format and photo usage rules. Share it with editors and any copywriters or PR partners so the feature reads like a single authoritative voice.
- Tone: first-person discovery vs. third-person reportage (choose one)
- Terminology: place names, transliterations, local terms and correct spellings
- Caption conventions: active verbs, one-line location + one-line context, credit line format
- Image credits and permissions: photographer credit template, rights statement, embargo rules
When pitching and delivering, use consistent phrasing in subject lines, filenames, and captions. Small consistency signals—like always including a one-line photo-credit and the publication slug—make your work easier to publish and reprint.
Coaching Framework: Travel Media Consulting Practices
Package your consulting services around the workflows you use. Typical offerings for travel photographers and editors include shot-list development, narrative coaching, sequencing reviews, and a mini brand style guide. Each service should produce tangible deliverables and clear timelines.
- Service packages: single-project (shot-list + storyboard), multi-trip retainer (monthly support and editing), workshops (hands-on or remote focused on workflow)
- Deliverables: editable shot-list template, storyboard PDF, preset pack, mini style guide, and a final delivery checklist
- Engagement models: fixed-fee project, monthly retainer with hourly credit, or one-day workshop with follow-up review
- Measurable outcomes: shot-list acceptance rate, average turnaround time, reduction in reshoots, editorial pickup/conversion
Position consulting as efficiency and risk-reduction: you’re not just improving images, you’re making features simpler to commission, edit and publish. Offer a short pilot (one destination brief + shot list) to demonstrate ROI before scaling to retainer work.
With a five-stage workflow, tight shot-list templates, a compact kit, disciplined editing practice and a mini style guide, travel photographers and editors can reliably produce publishable work from anywhere. The secret is deliberate constraint: fewer variables mean faster decisions, cleaner delivery, and stronger editorial storytelling.


暂无评论内容